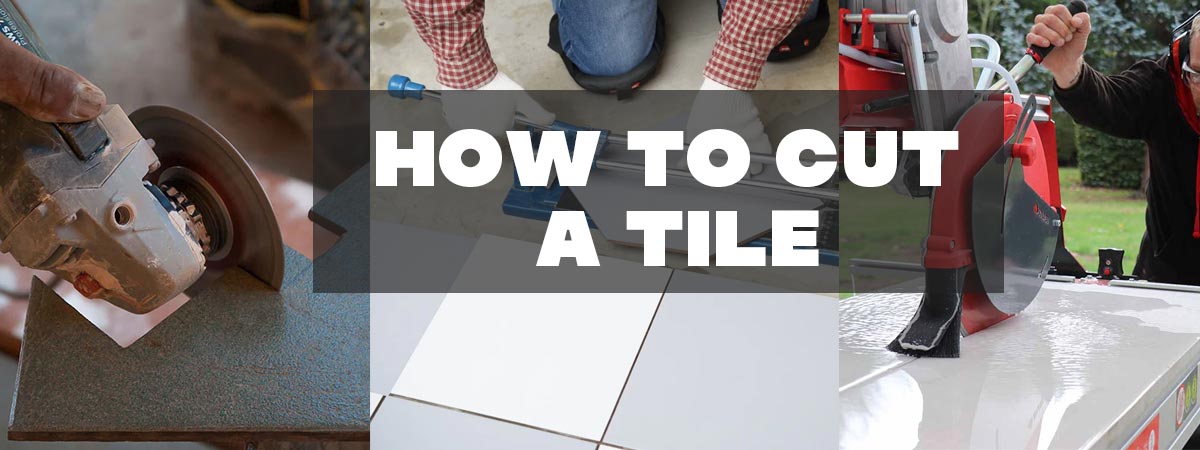
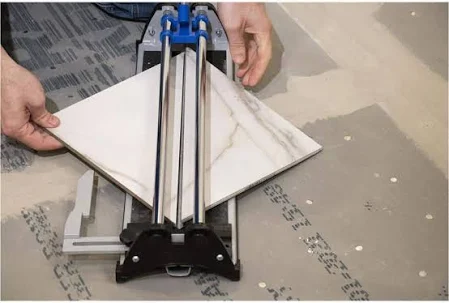
To begin, if you’re cutting basic ceramic or porcelain tiles, using a tile cutter or a wet saw is the most straightforward method. A tile cutter allows for quick, clean cuts and is ideal for straight or diagonal cuts. First, measure and mark your tile where you need to cut. Place the tile in the tile cutter, aligning the cutting wheel with your mark. Press down on the handle to score the tile, and then press or pull the handle to snap the tile along the scored line. This is the best way to ensure a clean, straight edge. If you need a tile cutter, you can typically find one at a tile cutter home depot or any hardware store offering a tile cutting service.
For more complex cuts, like how to cut tile around toilet or how to cut a hole in tile, you might use a tile saw or an angle grinder. How to use a tile saw involves filling the saw’s basin with water, which cools the blade as it cuts through the tile, preventing chips and cracks. Mark your tile where the cut is needed, then feed the tile into the saw slowly and steadily. To cut holes, such as for pipes or outlets, first measure and mark the tile. Then, use an angle grinder to score the outline of the hole, and finish by nipping away the excess tile with tile nippers or drilling a hole with a tile-specific hole saw.
For situations where you don’t have access to power tools, how to cut tile without a tile cutter includes using a simple glass cutter and a straight edge. This method, known as score and snap, is ideal for how to cut ceramic tile by hand. Mark your tile where it needs to be cut, then place a straight edge along the line. Use the glass cutter to score the tile along the straight edge, applying even pressure as you drag the cutter across the tile surface. Once scored, place the tile over a wire or a nail that aligns with the score line and press down on either side to snap the tile.
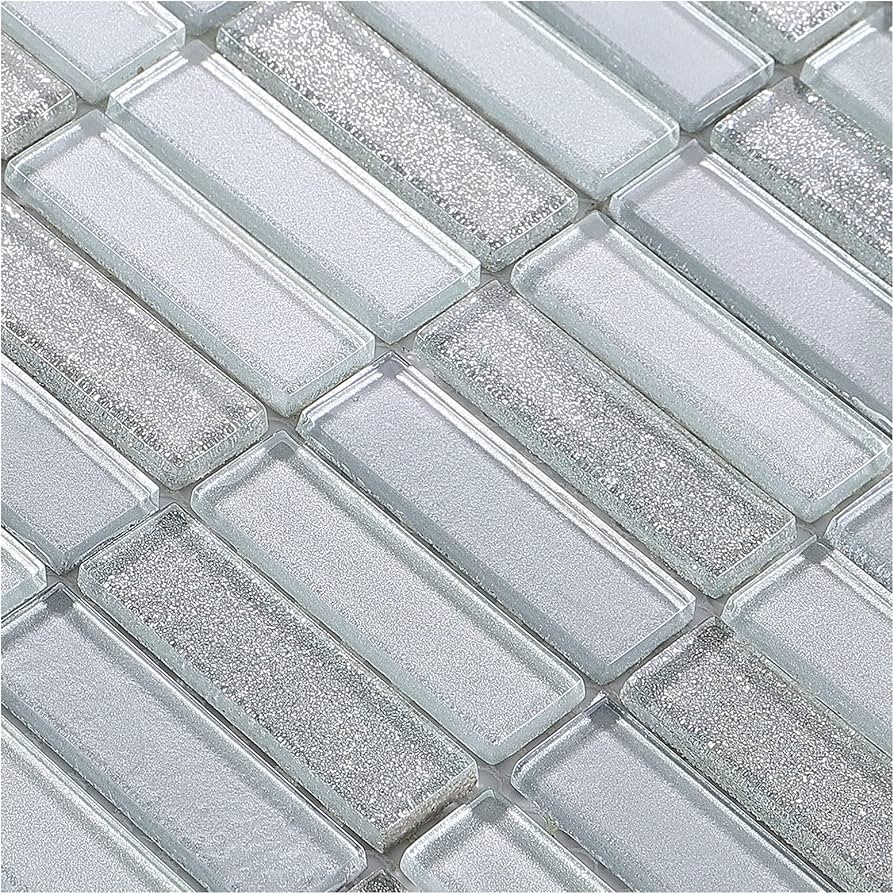
Lastly, for specialty tiles, like how to cut mosaic tile, how to cut glass tile without chipping, or how to cut stone tile, it’s crucial to use a wet saw with a diamond blade. These materials are more prone to chipping, so a wet saw helps make smoother cuts. If you need multiple tiles cut and don’t have the tools, consider using a tile cutting service near me or a home depot cutting center, which can handle the job with precision.
Remember, when cutting any tile, always wear safety glasses to protect your eyes from flying shards and dust. With the right tools and techniques, you can achieve professional-looking results on any tiling project.
Choosing the Right Tools to Cut Ceramic and Porcelain Tile
When you’re planning to cut ceramic or porcelain tiles, picking the right tools will make the job easier and ensure your tiles fit perfectly in their place. Here’s a simple guide on selecting tools:
- Manual Tile Cutters: These are great for straightforward, straight cuts. Think of them as a big paper cutter, but for tiles. They’re easy to handle and can make quick work of cutting several tiles.
- Wet Saws: Imagine a table saw, but with a water system that keeps the blade wet. This tool is perfect for cutting tough porcelain tiles or making detailed cuts, like U-shapes or holes. The water keeps the dust down and helps avoid overheating, which can crack the tile.
- Angle Grinders: If you need to cut a curve or a circle, an angle grinder is your tool. It’s like a hand-held saw that can cut through tiles with the right blade attached (make sure it’s a diamond blade).
- Tile Nippers: These are a bit like pliers. Use them for making small nips or cuts to adjust the shape of the tile around obstacles like pipes or corners.
How to Use a Tile Cutter for Straight and Diagonal Cuts
A tile cutter is ideal for someone new to tiling because it’s straightforward to use. Here’s how to make straight and diagonal cuts with it:
- Measure and Mark: Start by figuring out where the tile needs to fit and mark where you need to cut it. Use a simple pencil and a ruler or a square to draw a straight line on the tile.
- Setting Up the Tile Cutter: Put the tile in the tile cutter. Make sure the line you marked is directly under the cutting wheel. There’s a guide to help keep the tile from moving.
- Scoring the Tile: Now, press the handle and roll the cutting wheel across the tile from one end to the other along your marked line. You only need to press gently but firmly to make a shallow cut in the tile.
- Snapping the Tile: Once you’ve scored a line, some tile cutters have a separate part to press down and snap the tile along the scored line. Otherwise, you can gently press on either side of the score line to break the tile cleanly.
Cutting Tile Without a Tile Cutter: The Score and Snap Method
If you don’t have a tile cutter, you can still cut tiles with a simple hand tool and a straightforward method called score and snap:
- Tools Needed: You’ll need a basic glass cutter or a carbide-tipped pencil, which looks a bit like a pen but with a sharp cutting tip. You’ll also need a straight edge, like a ruler.
- Marking the Tile: Measure where the tile needs to fit and use a pencil to mark where you’ll cut. Lay the ruler or straight edge right over the marked line.
- Scoring: Hold the straight edge firmly and use the glass cutter or carbide pencil to press down and drag along the tile to score a straight line. Make sure to score firmly so the line is deep enough to weaken the tile.
- Snapping the Tile: Place the tile over the edge of a table, lining up the scored line with the table edge. Press down firmly on both sides of the tile, and it should snap cleanly along the scored line.
These techniques are user-friendly and don’t require expensive equipment, making them perfect for a DIY newbie. With a bit of practice, you’ll be cutting tiles like a pro!
How to Cut Ceramic Tile by Hand
Cutting ceramic tile by hand is a practical skill for smaller projects or when you don’t have access to power tools. Here’s how to do it step-by-step:
- Gather Your Tools:
- You will need a carbide-tipped tile scribe (or a simple glass cutter),
- A straight edge (like a metal ruler),
- Tile nippers for any small adjustments.
- Mark the Tile:
- Measure and determine where the tile needs to be cut.
- Use a pencil to mark the cutting line on the tile.
- Score the Tile:
- Place the straight edge along the line you marked.
- Hold the straight edge firmly and use the tile scribe to score the tile. Press down firmly and drag the scribe along the line, applying consistent pressure to create a deep score.
- Snap the Tile:
- Place the tile over the edge of a firm surface, aligning the scored line with the edge.
- Press down sharply on the side of the tile that is overhanging the edge to snap it along the scored line.
- Smoothing the Edges:
- Use a sanding stone or a tile file to smooth down any sharp or uneven edges along the cut.
Shower Tile Top Deals
Using a Tile Saw: How to Cut Tile on Wall and Floor
Using a tile saw is ideal for cutting tiles that are already installed on a wall or floor, or for making precise cuts on new tiles before installation. Here’s how to use a tile saw for these purposes:
- Set Up the Tile Saw:
- Ensure the tile saw’s water reservoir is filled to keep the blade cool and minimize dust.
- Place the tile saw on a stable, level surface.
- Mark Your Tile:
- Measure and mark where the cut will be made on the tile using a pencil.
- Cut the Tile:
- For wall tiles: Carefully remove the tile from the wall if not yet installed. If the tile is already in place, protect the surrounding area with tape and a drop cloth.
- For floor tiles: Ensure the area is clean and clear of debris.
- Place the tile on the saw table, aligning the cutting line with the saw blade.
- Turn on the saw and gently push the tile into the blade, guiding it steadily. Do not force the tile; let the saw do the work.
- Finishing the Cut:
- Once the cut is complete, turn off the saw and inspect the tile. If there are any rough edges, gently smooth them with a sanding stone.
How to Cut Porcelain Tile with a Tile Saw
Porcelain tiles are harder than ceramic tiles and require a wet saw with a diamond blade for precise, clean cuts. Here’s the process:
- Prepare the Tile Saw:
- Fill the tile saw’s water basin to ensure the blade stays wet and cool during the cut.
- Check that the diamond blade is secure and sharp.
- Measure and Mark the Tile:
- Use a pencil to mark where you need to cut the porcelain tile. For more visibility, you can use a non-permanent marker.
- Cutting the Tile:
- Place the porcelain tile on the saw’s platform.
- Align the cutting line with the blade.
- Turn on the saw and gently slide the tile towards the blade. Keep your hands clear of the blade and hold the tile firmly.
- Push the tile slowly and evenly; do not rush the cut as porcelain is dense and can chip if mishandled.
- Check the Cut:
- Once you’ve finished cutting, turn off the saw and remove the tile.
- Inspect the edges. If there are any small chips or rough spots, gently file them down with a diamond hand pad or a rubbing stone.
These detailed steps will help you handle different tile materials and cutting situations, ensuring that your DIY tile projects look professional and neat.
Alternative Methods: How to Cut Tile with an Angle Grinder
Using an angle grinder to cut tile is a versatile method, especially when you need to make irregular cuts or cut through very hard materials like porcelain or stone. Here’s how to do it safely and effectively:
- Choose the Right Blade:
- Install a diamond cutting wheel on your angle grinder. Ensure it is suitable for the type of tile you are cutting.
- Safety First:
- Wear protective eyewear, gloves, and ear protection to safeguard against flying debris and noise.
- Mark the Tile:
- Use a marker or a grease pencil to outline the cut on the tile.
- Set Up Your Workspace:
- Secure the tile to a workbench or other stable surface with clamps to prevent movement.
- Cutting the Tile:
- Turn on the angle grinder and let the blade reach full speed.
- Approach the tile from the edge, gently pressing the blade into the tile following the marked line.
- For deeper cuts, make several passes, slightly deepening each pass to avoid stressing the tile too much.
- Finishing Touches:
- Smooth the cut edges with a grinding stone or sandpaper to remove any sharpness or burrs.
Detailed Guide on How to Cut Mosaic Tile
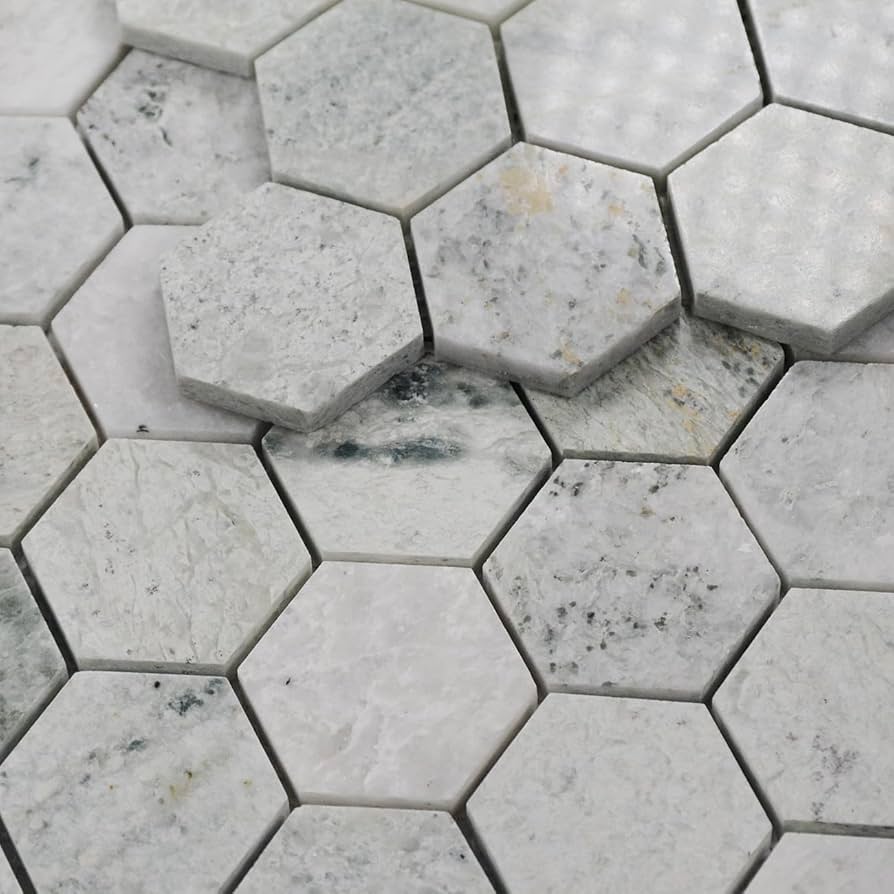
Mosaic tiles, often mounted on a mesh sheet, can be tricky to cut because of their small size and varied material composition. Here’s a detailed guide:
- Select the Proper Tool:
- Use a tile nipper or a wet saw with a diamond blade for precision and to prevent damage to the small tiles.
- Prepare the Mosaic Tile:
- If using a wet saw, leave the mosaic tile sheet intact. If using nippers, detach individual tiles from the mesh as needed.
- Mark the Desired Cut:
- If the mosaic is on a mesh, apply painter’s tape along the cutting line to hold the tiles in place and mark your cut on the tape.
- Cutting Process:
- For a wet saw: Feed the sheet slowly into the saw, keeping your fingers well away from the blade.
- For tile nippers: Grip the tile edge where you need to make the cut and apply firm pressure to snap the tile along the marked line.
- Clean and Install:
- Once cut, check the tiles and smooth any rough edges with fine-grit sandpaper before installing.
Grout Product Top Deals
How to Cut a Hole in Tile for Plumbing and Electrical Outlets
Cutting a hole in a tile for plumbing or electrical outlets is a delicate process that requires precision. Follow these steps to ensure a clean cut:
- Measure and Mark:
- Accurately measure the location of the outlet or pipe. Transfer these measurements to the tile, marking the center point of where the hole needs to be.
- Choose the Right Tool:
- For circular cuts, use a diamond hole saw. For square or rectangular cuts, consider using an angle grinder.
- Set Up the Tile:
- Secure the tile on a stable surface to prevent movement. Place non-slip matting underneath if available.
- Drilling the Hole:
- Attach the appropriate size diamond hole saw to your drill. Begin drilling at a low speed to ensure control and prevent the tile from cracking. Use water to keep the drill bit cool.
- Finishing the Edges:
- Smooth the edges of the hole with a tile file or fine-grit sandpaper to remove any sharp areas.
How to Use Tile Nippers and Tile Breakers Effectively
Tile nippers and breakers are essential tools for making irregular cuts or small adjustments to tile. Here’s how to use them effectively:
- Mark the Tile:
- Use a pencil to draw the line where you need to make the cut on the tile.
- Scoring the Tile:
- Use a glass cutter or tile scribe to score along the marked line. This helps to weaken the tile along the line of the cut.
- Nipping the Tile:
- Hold the tile with one hand and place the nippers on the score line. Apply steady pressure to snap small sections of the tile along the score. Repeat this step along the line.
- Smoothing Out:
- Use a sanding stone or a hand file to smooth out any rough edges after nipping.
Utilizing Home Depot’s Tile Cutter and Tile Cutting Service
Home Depot offers tile cutting tools and services that can be very helpful for DIY projects. Here’s how to utilize these resources:
- Visit Your Local Home Depot:
- Go to the flooring department where tile cutting tools and services are typically offered.
- Choose Between DIY Tools and Professional Service:
- You can either rent a tile cutter to use at home or utilize the in-store cutting service. Ask a store associate for assistance and recommendations based on your tile type.
- Prepare Your Tiles:
- If you are using the in-store service, bring your measurements and any specific cutting instructions. Ensure your tiles are clean and marked if specific cuts are needed.
- Using the Tile Cutter:
- If renting, follow the provided instructions to set up and use the tile cutter safely at your home.
Cutting Tile with a Grinder: Techniques and Tips
Using a grinder to cut tile is effective for making precise cuts and shaping the tile as needed. Here are some techniques and tips:
- Select the Appropriate Blade:
- Use a diamond blade in your grinder to ensure it can cut through the tile without causing damage.
- Measure and Mark Your Cut:
- Accurately measure and use a marker to draw the cut line on the tile.
- Secure the Tile:
- Clamp the tile to a stable surface to prevent movement while cutting.
- Cutting the Tile:
- Begin cutting along the marked line using the grinder. Keep the tool steady and do not rush the cut. Spraying water on the cut line can help reduce dust and heat.
- Check and Smooth the Edges:
- After cutting, inspect the tile for any uneven edges or burrs. Use a hand file or sandpaper to smooth the edges.
Tile Cutting Services Near Me: Where to Get Professional Cuts
For those who prefer professional quality cuts or do not have the tools to cut tiles themselves, here’s how to find tile cutting services:
- Search Online:
- Use search terms such as “tile cutting services near me” or “professional tile cutters” to find local services.
- Visit Local Tile Shops:
- Many tile stores offer cutting services, and they can handle more complex or large-volume cutting jobs.
- Consult with Home Improvement Stores:
- Larger chains like Home Depot or Lowe’s often provide tile cutting services, especially for tiles purchased at their location.
How to Cut Large Format Tile: Techniques and Tools
Large format tiles require special handling due to their size and weight. Here’s how to cut them effectively:
- Use the Right Tools:
- A large wet saw is ideal for making straight cuts on large format tiles. Ensure the wet saw can accommodate the size of your tile.
- Measure and Mark the Tile:
- Due to their size, ensure your measurements are accurate. Use a straight edge and a marker to draw the cut line.
- Handle with Care:
- Large tiles are heavy and fragile. Carefully place the tile onto the wet saw platform without chipping the edges.
- Cutting the Tile:
- Feed the tile slowly and steadily through the saw. Do not force the tile; let the saw do the work.
- Finishing Touches:
- After cutting, smooth any rough edges with a diamond hand pad to ensure a perfect finish.
How to Cut Tiles on the Wall: Addressing Installed Tile
Cutting tiles that are already installed on a wall requires precision and care to avoid damaging the surrounding area:
Step 1: Select the Right Tool
- Use an angle grinder fitted with a diamond blade for the best precision and control.
Step 2: Mark Your Cutting Line
- Apply painter’s tape along the line where you intend to cut. This not only helps in marking the line but also protects the tile surface from chips.
Step 3: Prepare Your Workspace
- Cover surrounding areas to protect them from dust and debris. Ensure good ventilation or use a dust extraction system.
Step 4: Cut the Tile
- Carefully cut along the marked line with the angle grinder, working slowly to maintain control and prevent overcutting.
Step 5: Smooth the Edges
- Once the cutting is complete, use a diamond hand file or sandpaper to smooth out any rough edges.
How to Cut Subway Tile and Large Porcelain Tiles
Cutting subway and large porcelain tiles can be managed with a few specific tools and techniques:
Step 1: Measure and Mark
- Use a pencil and a straight edge to mark where the tile needs to be cut.
Step 2: Setup the Tile Cutter
- For subway tiles, a manual tile cutter is suitable. For large porcelain tiles, use a wet saw.
Step 3: Scoring and Snapping
- For subway tiles, score the tile with the cutter, then snap it along the scored line. For porcelain tiles, slowly feed the tile into the wet saw.
Step 4: Finishing Touches
- Smooth the cut edges with a sanding stone or diamond hand pad to remove any sharpness.
How to Cut Backsplash Tile for Kitchen Renovations
When renovating a kitchen backsplash, precise cuts on tiles ensure they fit perfectly around cabinets and appliances:
Step 1: Measure and Mark the Tile
- Determine the layout and measure where cuts are needed. Use a grease pencil to mark the tiles.
Step 2: Choose Your Tool
- For ceramic or glass backsplash tiles, use a wet saw with a diamond blade.
Step 3: Cutting the Tile
- Feed the tile gently into the wet saw, cutting slowly to avoid chipping.
Step 4: Check the Fit
- Dry fit the tiles on the wall to ensure they align correctly with the space and make any adjustments if necessary.
Creating 45 Degree Tile Edge for Aesthetic Finishes
Creating a beveled edge on tile can add a sophisticated finish to any installation:
Step 1: Mark the Tile
- Determine the length of the bevel and mark it on the tile.
Step 2: Set Up the Wet Saw
- Adjust the saw to make a 45-degree cut.
Step 3: Cut the Tile
- Gently push the tile through the saw, keeping your hands steady to ensure an even cut.
Step 4: Sand and Smooth
- Sand the edges to smooth out any roughness and create a polished finish.
How to Cut Tile Without Chipping: Ensuring Clean Cuts
Avoiding chips in tile during cutting is crucial for a professional finish:
Step 1: Use a Sharp Blade
- Ensure the cutting blade, whether on a wet saw or tile cutter, is sharp and appropriate for the tile material.
Step 2: Apply Painter’s Tape
- Place painter’s tape over the cut line to reduce chipping.
Step 3: Cut Slowly
- Feed the tile slowly into the cutter or saw, applying gentle pressure.
Step 4: Wet Saw Method
- Keep the tile wet if using a wet saw, which helps reduce chips.
How to Cut Hexagon and Specialty Shape Tiles
Cutting specialty shapes requires precision and sometimes creative cutting techniques:
Step 1: Template Creation
- Create a cardboard template of the shape you need, especially for complex cuts.
Step 2: Mark the Tile
- Trace the template onto the tile using a grease pencil.
Step 3: Use Nippers or a Wet Saw
- For intricate shapes, use tile nippers to carefully nip away the excess tile. For cleaner cuts, use a wet saw.
Step 4: Finishing the Cut
- Smooth the edges with a file or sandpaper to perfect the shape.
Advanced Cutting: How to Cut Tile with Circular and Miter Saws
Using power saws can speed up the cutting process and handle large volumes of tile:
Step 1: Safety First
- Wear safety goggles, ear protection, and a dust mask.
Step 2: Set Up the Saw
- Install a diamond blade on the circular or miter saw.
Step 3: Measure and Mark
- Clearly mark where you will cut the tile.
Step 4: Cut the Tile
- Secure the tile, then cut it using steady, even pressure to maintain a straight line.
Step 5: Cool Down
- If using a dry saw, periodically cool the blade with water to prevent overheating.
Professional Tips: How to Cut Tile Around Outlets
Cutting tile to fit around outlets requires careful measurement and cutting:
Step 1: Measure Precisely
- Measure the location of the outlet on the wall and transfer these measurements to the tile.
Step 2: Mark the Cut
- Use a pencil to mark the area on the tile where it needs to be cut out.
Step 3: Drill Holes
- For square or rectangular cuts, drill holes at each corner of the marked-out area to simplify cutting.
Step 4: Use an Angle Grinder
- Connect the drilled holes with an angle grinder or a wet saw to complete the cut.
Finishing Touches: How to Trim and Bevel Tile Edges
Proper finishing of tile edges can significantly enhance the installation’s appearance:
Step 1: Choose the Right Tool
- Use a hand-held tile edger or a wet saw with a beveling capability.
Step 2: Mark the Bevel
- Decide on the width of the bevel, and mark it on the edge of the tile.
Step 3: Cut the Bevel
- Gently push the tile through the saw or use the hand-held edger to create the bevel.
Step 4: Smooth and Finish
- Sand the beveled edge with fine-grit sandpaper to make it smooth and ready for installation.
These detailed processes help ensure precise cuts and professional-quality finishes in various tiling projects.
Successfully tackling a tile installation project, whether it’s sprucing up your kitchen backsplash or fully renovating your shower, involves mastering several techniques, notably how to cut tile. This process can vary significantly depending on the type of tile, be it ceramic, porcelain, or even glass. Utilizing tools like a tile cutter home depot offers or exploring tile cutting service near me can equip you with the necessary resources to achieve those perfect cuts.
For DIY enthusiasts, learning how to cut ceramic tile by hand or using more sophisticated tools such as a tile saw or angle grinder can be crucial. These methods are invaluable when you need to customize tiles for complex patterns or fit them around obstacles like outlets and fixtures. Specifically, techniques such as cutting tile with a grinder or mastering how to use a tile cutter can greatly enhance the precision of your cuts, ensuring that every piece fits seamlessly into its designated space.
Moreover, for intricate designs like mosaics or large format tiles, knowing how to cut mosaic tile and how to cut large format tile are skills that can significantly elevate the aesthetics of your space. Each tile type, from stone tile to glass tile, requires specific methods to minimize damage like chipping or cracking. For instance, understanding the best way to cut glass tile without chipping is essential for maintaining the beauty and integrity of the material.
In addition to cutting, preparing the surface and finishing are just as important. This is where skills in how to tile a Shower and How To Grout Tile become relevant, guiding you through the complete process from start to finish. These tasks ensure that the cut tiles not only fit perfectly but are also installed in a way that they last, showcasing the effort and craftsmanship put into the work.
Whether you’re refining edges with miter tile techniques or making specialized cuts for electrical outlets, the journey from selecting the right tile cutting tools to the final grouting stage is fulfilling. By mastering these skills, you can transform any tiled area into a beautifully crafted space.
Tile Cutter Top Products
Best Ways to Cut Glass Tile Without Chipping
Glass tiles are beautiful but can chip easily if not handled correctly during cutting:
- Use a Wet Saw with a Diamond Blade:
- Make sure the blade is sharp and specifically designed for cutting glass.
- Apply Masking Tape:
- Place masking tape on the glass tile along the line of the cut to help support the glass and reduce chipping.
- Proper Blade Speed and Cooling:
- Use a wet saw at a low speed with plenty of water to ensure the tile does not overheat.
- Gentle Handling:
- Push the tile through the blade very slowly and gently. Rushing can increase the likelihood of chipping.
How to Cut Stone Tile for Advanced DIYers
Stone tiles, such as granite or marble, require specific techniques due to their hardness:
- Equipment:
- Use a wet saw with a diamond blade that can handle the density of stone.
- Marking the Tile:
- Mark your cutting line with a pencil on both the top and the bottom of the tile to ensure accuracy.
- Cutting the Tile:
- Feed the tile through the wet saw slowly and steadily. Do not force the tile; let the saw do the work.
- Finishing:
- Smooth the cut edges with a diamond polishing pad or sanding stone.
Tips for Cutting Tile Around Toilet and Other Fixtures
Cutting tile to fit around toilets and other fixtures requires precision:
- Template Creation:
- Create a template of the area using cardboard or paper for complex cuts and shapes.
- Transfer Template to Tile:
- Place the template on the tile and trace the shape with a pencil.
- Cutting the Tile:
- Use a wet saw for straight cuts and an angle grinder for curved cuts.
- Dry Fitting:
- Always dry fit the tile in place to ensure it fits properly before applying adhesive and permanently installing.
By following these methods, you can achieve professional-quality cuts for various tile materials and complex shapes, ensuring a successful installation or repair.

